FAQ | GAS GRILLS
Find Parts, Warranty & Manuals
Start with your grill's model number. It's the key to getting the right parts and product info.
GAS GRILLS - QUESTIONS & ANSWERS
HOW DO I PREHEAT THE GRILL CORRECTLY?
The lid of the grill should be closed during heating to reach the desired temperature. To achieve a perfect result, the grill should be preheated for 15 - 20 minutes on the highest setting.
WHAT IS THE DIFFERENCE BETWEEN DIRECT AND INDIRECT GRILLING?
There are two important methods of grilling with a closed lid. One is direct grilling and the other is indirect grilling. Here is the difference
direct grilling
. With direct heat, you cook the food directly over the flame. Direct heat is particularly suitable for hot grilling or for food with short cooking times. The food cooks quickly, but also burns quickly. Therefore, you must keep a close eye on the grill. The food is directly above the burner or charcoal. Temperatures in this area can reach 250° C and upwards.
Suitable foods include thin foods with a low water or sugar content that cook well over direct heat, e.g. steaks, fish, vegetables and other delicate foods.
indirect grilling
. With indirect heat, food is cooked on the cooler side of the grill. When the lid is closed, the grill works like an oven. This is ideal for thicker grilled food or food with a high sugar content - anything that needs to be cooked slowly or "barbecue style". You can also start with direct heat and cook the food over indirect heat. Temperatures in this range are usually around 100° C. It therefore takes longer for everything to cook - just like cooking in the oven.
Suitable foods include, for example, tougher meat and larger roasts, ribs and whole chickens, which are ideal for indirect heat.
WHAT IS THE DIFFERENCE BETWEEN SUREFIRE® AND ELECTRONIC IGNITION?
With SureFire® ignition, each burner is equipped with an electrode, so that it is possible to choose variably which burner is ignited. With electronic ignition, only one burner can be ignited, the others must be switched on in sequence.
CAN I USE THE MADE2MATCH PRODUCTS ON ALL GRILLS?
There is a large number of grills that you can equip with our MADE2MATCH system. Here you can see which MADE2MATCH products fit your barbecue. Please note that unfortunately you can't use the system on all models, as the required device is not available.
| 140070 | 140071 | 140072 | 140073 | 140074 | 140079 | 140080 | |
| MADE2MATCH | MADE2MATCH | MADE2MATCH | MADE2MATCH | MADE2MATCH | MADE2MATCH | MADE2MATCH | |
| Charcoal Tray | Smoker Box | Storage Box | Inside Shelf | Multi-funktion shelf |
Inside Shelf | Cooling Basket | |
| Professional | |||||||
| PRO S 2 | |||||||
| PRO S 3 | |||||||
| PRO S 4 | |||||||
| CORE B 2 | |||||||
| CORE B 3 | |||||||
| CORE B 4 | |||||||
| Performance | |||||||
| PRO S 2 | |||||||
| PRO S 3 | |||||||
| PRO S 4 | |||||||
| CORE B 2 | |||||||
| CORE B 3 Cart | |||||||
| CORE B 3 Cabinet | |||||||
| CORE B 4 | |||||||
| Power Edition | |||||||
| Gas2Coal 2.0 | |||||||
| 210 | |||||||
| 330 | |||||||
| 440 |
WHICH GRILL COVER IS FITTING FOR MY BARBECUE?
If you want your barbecue to remain functional for as long as possible, you need a weather protection cover. This protects your barbecue from various environmental influences. It is water-repellent and made of durable polyester fabric. Here you can find the right weather protection cover for your grill.
| 140003 | 140004 | 140005 | 140384 | 140766 | 140385 | 140118 | 140388 | 140383 | 140382 | ||
| Premium 2 Burner Grill Cover |
Premium 3 Burner Grill Cover |
Premium 4 Burner Grill Cover |
Universal 2 Burner Grill Cover |
Universal 3-4 Burner Grill Cover |
Extrawide Grill Cover |
SMART-E Grill Cover |
All-Star Grill Cover |
Cover for MOK 3 burner grill |
Cover for MOK entertainment module |
||
| E-Novation | |||||||||||
| SMART-E | |||||||||||
| Professional | |||||||||||
| PRO S 2 | |||||||||||
| PRO S 3 | |||||||||||
| PRO S 4 | |||||||||||
| CORE B 2 | |||||||||||
| CORE B 3 | |||||||||||
| CORE B 4 | |||||||||||
| 2200 | |||||||||||
| 3400 | |||||||||||
| 4400 | |||||||||||
| 4600 | |||||||||||
| 3500 Black Edition | |||||||||||
| 4500 Black Edition | |||||||||||
| Performance | |||||||||||
| POWER EDITION 3 | |||||||||||
| PRO S 2 | |||||||||||
| PRO S 3 | |||||||||||
| PRO S 4 | |||||||||||
| CORE B 2 | |||||||||||
| CORE B 3 Cabinet | |||||||||||
| CORE B 3 Cart | |||||||||||
| CORE B 4 | |||||||||||
| 220 | |||||||||||
| 330 | |||||||||||
| 340 | |||||||||||
| 440 | |||||||||||
| Advantage | |||||||||||
| PRO S 2 | |||||||||||
| PRO S 3 | |||||||||||
| PRO S 4 | |||||||||||
| 225 | |||||||||||
| 345 | |||||||||||
| 445 | |||||||||||
| Gas2Coal | |||||||||||
| 2.0 210 | |||||||||||
| 2.0 330 | |||||||||||
| 2.0 440 | |||||||||||
| 330 | |||||||||||
| 440 | |||||||||||
| Convective | |||||||||||
| 210 | |||||||||||
| 310 | |||||||||||
| 410 | |||||||||||
| 440 | |||||||||||
| 640 | |||||||||||
| All-Star | |||||||||||
| 120 / 125 | |||||||||||
| Platinum | |||||||||||
| 2200 | |||||||||||
| 3400 | |||||||||||
| 4400 | |||||||||||
| Outdoor Kitchen | |||||||||||
| Ultimate 3200 | |||||||||||
| Ultimate Entertainment | |||||||||||
LID MOUNTED TEMPERATURE GAUGES MEASURE AIR TEMPERATURE INSIDE THE GRILL NOT GRATE TEMPERATURE
A common misconception is that the temperature gauge in the lid of your grill is reading the cooking temperature. This is not true. Lid mounted temperature gauges measure the air temperature at the location of the gauge. The grate temperature can be much higher than the lid temperature due to ambient conditions and calibration of the gauge. If you are questioning the cooking temperature based on the reading from your lid mounted temperature gauge please take a reading at the cooking grate surface. This will allow you to see the actual cooking temperature.
WHAT TEMPERATURE DOES THE LID THERMOMETER SHOW?
A common misconception is that the thermometer in the lid of your TRU-Infrared™ grill reads the grill grate temperature. The thermometer mounted on the lid measures the air temperature under the lid (cooking chamber). The grate temperature can therefore be much higher than the temperature displayed on the lid due to environmental conditions and the calibration of the thermometer. One of the most important influences on the temperature are wind speed and the outside temperature. Here, the lid thermometer should level off between 220 °C and 270 °C under optimal circumstances and weather conditions.
ENAMEL/VARNISH IS PEELING OFF
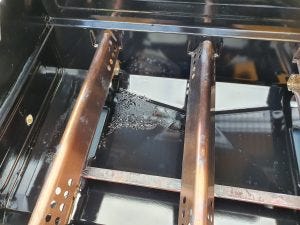
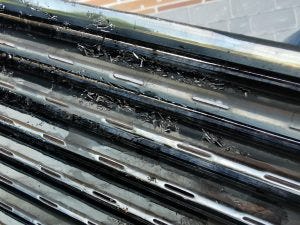
After some barbecue evenings, it sometimes looks to you as if the enamel / paint in the fire box or in the lid is loosening or peeling off.
Don't worry: the lid and the firebox of the grill are enamelled. No paint or other coating is applied. However, what flakes off is clinging grease residue/marinade that burns with the grilling (fat carbonized from the heat). So it looks like the paint / enamel is peeling off here. However, these residues can be removed again by soaking and cleaning with fat-dissolving agents and hot water.
If you own the Performance Line with the porcelain-enamelled steel grates, then this also applies to the grates.


HOW DO I ADJUST THE DOOR OF MY GAS GRILL?
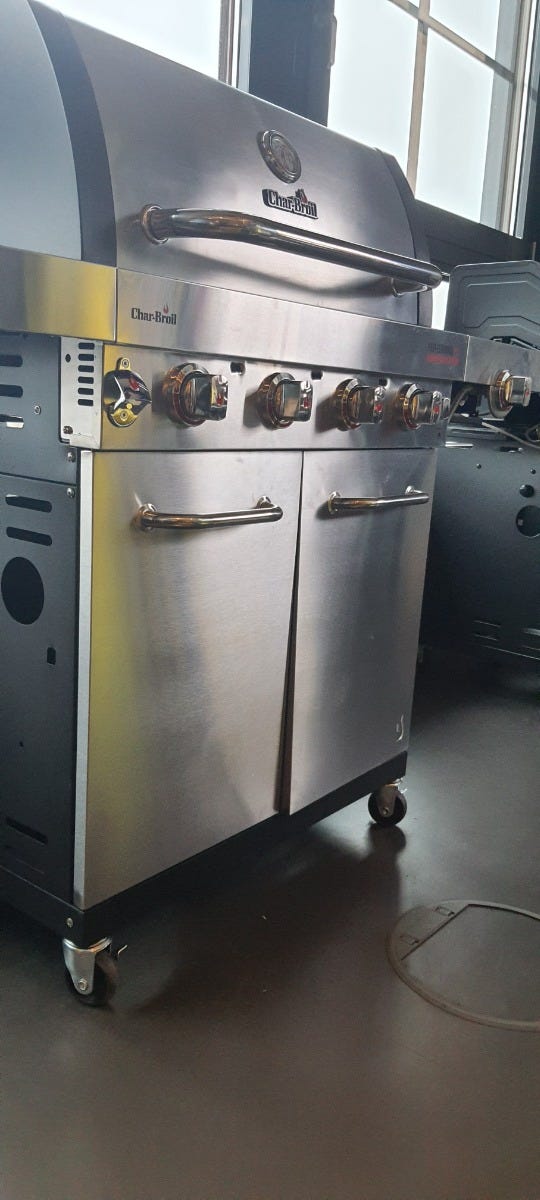
You have just successfully set up your grill and notice that a door does not close properly. You can fix this problem without tools and with a light hand movement.
Open the door and hold it with one hand each at the top and bottom of the outer door edges. If the door z. For example, if it doesn't close properly at the bottom, press the bottom edge in slightly and pull the top slightly towards you. You do the opposite if, for example, the door above doesn't close properly.
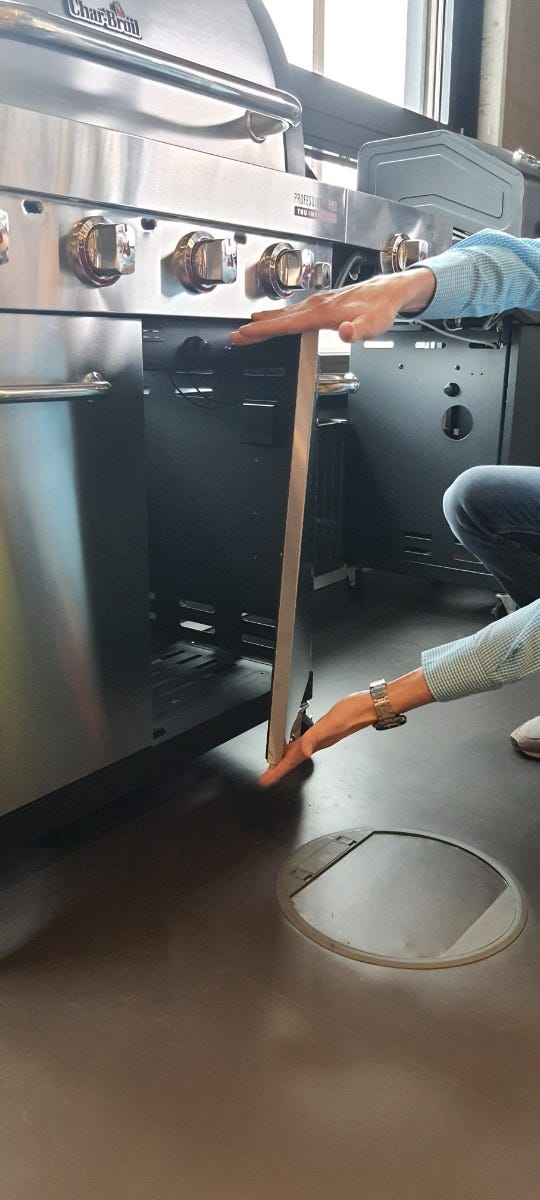
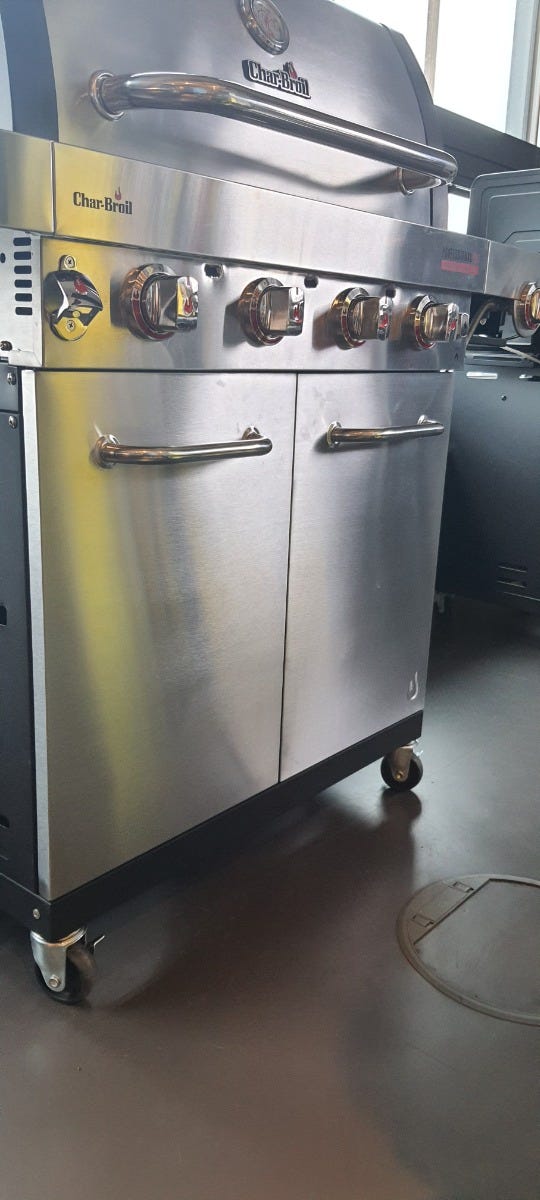
Open the door and hold it with one hand each at the top and bottom of the outer door edges. If the door z. For example, if it doesn't close properly at the bottom, press the bottom edge in slightly and pull the top slightly towards you. You do the opposite if, for example, the door above doesn't close properly.


WHY ISN'T MY GRILL HEATING UP PROPERLY?
Gas grills generally produce an even heat, but it is normal to experience slight temperature fluctuations in different areas of the grill. However, if you find that part of your grill is not getting hot enough or is overheating, then it is safe to assume that something is wrong. The reasons for this can be the following points:
- Clogged burners
- The burners on a gas grill have multiple openings on the sides through which the gas flows to create the flame. If grease and food debris gets on the burners, the holes can clog, preventing gas from flowing properly. Try to clean the burners, e.g. B. use a grill brush to remove dirt from the outside. The burners are best cleaned from the inside with a bottle brush. Check that water flows evenly through all holes after cleaning.
- Too greasy / dirty Heat Tents
- The Heat Tents (burner covers) cover the burners of your gas grill. They usually protect the burners from dripping fat and gravy. But they can also add some flavor to your food as the gravy drips down, heats up, and then smokes. However, if too much fat has built up, the heat tents can catch fire from the fat, resulting in uneven heat. You can use a brush to clean the heat shields here. But if the dirt is so stubborn, then you should replace it.
- Rusted heat tents
- Heat tents, also known as heat shields, work best when they are clean. Rusted Heat Tents can cause flare-ups and uneven heat distribution. You can remove superficial rust (rust film) with a brush. However, if the heat shields are too rusty or already have rust holes, you should definitely replace them.
WHY WON'T MY GAS GRILL LIGHT?
There are many reasons as to why your gas grill isn't lighting. Make sure to check the burners, ignition battery, electrode wires and the propane tank.
Check the burners
Check that the grill burner is engaged with the control panel, and make sure your valves are positioned inside the burner tubes. If your grill won't light, it could be because you're lighting the wrong burner. See instructions on the control panel of your grill and in your manual. The grill burners could be blocked if your grill doesn't light. Pests, spider webs or other debris could be blocking them.Check the battery
Make sure that the ignition batter is not dead. If it is, you'll need to replace your igniter battery. Make sure the battery is correctly positioned. Follow the instructions in your manual. Check to make sure that the battery electrodes are not wet, oxidized or slightly corroded. You may need to remove battery and clean off electrodes with dry cloth or with alcohol wipe. Reinstall battery.Check the electrode wires
Make sure that the electrode wires are connected properly. Reconnect the wires or replace the electrode wire assembly. Make sure that the electrode tip is in the right position. The electrode should be pointing toward the gas port opening on a burner. The distance should be 1/8 inch to 1/4 inch. Adjust as necessary. If your grill won't light, it could be because you have dirty electrode terminals. Clean them with rubbing alcohol and a clean cotton swab. If your grill is not lighting, are you seeing sparks at your electrodes? If so, you may have a damaged electrode. You will need to replace it.Check the propane tank
Make sure the propane tank is connected to the grill properly. If your grill isn't connected correctly, you could have trouble lighting it. Make sure the coupling nut and propane tank cylinder valve are fully connected. Turn the coupling nut approximately one-half to three-quarters additional turn until a solid stop. Tighten by hand only. Do not use tools or you could strip the threads.
CAN THE GRIDS GO IN THE DISHWASHER?
Basically, you shouldn't clean the grill grates in the dishwasher, as this removes the patina that forms on the grill grate over time.
Stainless steel grids
Like the emitter plates, stainless steel grates are made of stainless steel and can be cleaned in the dishwasher without any problems.
Cast iron grids
A cast iron grid should never be cleaned in the dishwasher. In principle, you should not use detergent here either, only in exceptional cases. If you have cleaned the grill grate with washing-up liquid, then you should reseat the grill grate as you did when you used it for the first time. We recommend that you rub the grill grate with heat-resistant oil after each cleaning.
Porcelain-enamelled cooking grates
You only need to expose porcelain-enamelled grill grates to high heat and then, when the grill has cooled down, brush off the leftovers with our cool-clean brush. You can also clean the grates with mild detergent, but you don't actually have to.
Emitter Plates
Emitter plates are made of stainless steel and can be cleaned in the dishwasher, provided they fit. So that you can get more from your emitter plates, you should rub them with heat-resistant cooking oil after cleaning, just like the cast iron grates.
WHICH GAS BOTTLE IS THE RIGHT ONE?
You can use any standard gas bottle. There are different sizes that vary between 5 - 11 kg. All gas bottles can be placed in the tank device in the base plate (if available) without any problems. In any case, check your operating instructions to see whether we also offer this option for your model. For safety reasons, however, we always recommend placing the bottles next to the grill while grilling. You can either rent or buy gas bottles.
IGNITION - QUESTIONS & ANSWERS
WHAT IS THE DIFFERENCE BETWEEN SUREFIRE® AND ELECTRONIC IGNITION?
With SureFire® ignition, each burner is equipped with an electrode, so that it is possible to choose variably which burner is ignited. With electronic ignition, only one burner can be ignited, the others must be switched on in sequence.
WHAT IS THE SILVER CHAIN ON THE SIDE OF MY GRILL FOR?
This is a match holder in case the electronic ignition fails. You can then stick a match into the small ring, light it and ignite burners through the hole on the side. Here's a little guide: Please don't use a lighter to light the grill and don't lean over the grill while you're lighting it.
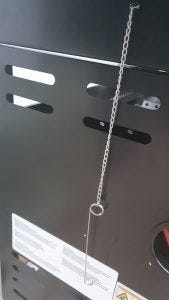
- Turn gas burner control valves to O (off)
- Open the lid during lighting or re-lighting
- Turn on the gas on the gas bottle
- Place the match in the match holder (hangs on the side panel of the grill)
- Strike the match, then light the burner by inserting the match through the match hole on the side of the grill
- Immediately press and turn the burner control knob to the high position. Make sure the burner burns and stays lit
- Light the adjacent burners in turn by turning the knobs to the HIGH position as well.

WHY WON'T MY GAS GRILL LIGHT?
There are many reasons as to why your gas grill isn't lighting. Make sure to check the burners, ignition battery, electrode wires and the propane tank.
Check the burners
Check that the grill burner is engaged with the control panel, and make sure your valves are positioned inside the burner tubes. If your grill won't light, it could be because you're lighting the wrong burner. See instructions on the control panel of your grill and in your manual. The grill burners could be blocked if your grill doesn't light. Pests, spider webs or other debris could be blocking them.Check the battery
Make sure that the ignition batter is not dead. If it is, you'll need to replace your igniter battery. Make sure the battery is correctly positioned. Follow the instructions in your manual. Check to make sure that the battery electrodes are not wet, oxidized or slightly corroded. You may need to remove battery and clean off electrodes with dry cloth or with alcohol wipe. Reinstall battery.Check the electrode wires
Make sure that the electrode wires are connected properly. Reconnect the wires or replace the electrode wire assembly. Make sure that the electrode tip is in the right position. The electrode should be pointing toward the gas port opening on a burner. The distance should be 1/8 inch to 1/4 inch. Adjust as necessary. If your grill won't light, it could be because you have dirty electrode terminals. Clean them with rubbing alcohol and a clean cotton swab. If your grill is not lighting, are you seeing sparks at your electrodes? If so, you may have a damaged electrode. You will need to replace it.Check the propane tank
Make sure the propane tank is connected to the grill properly. If your grill isn't connected correctly, you could have trouble lighting it. Make sure the coupling nut and propane tank cylinder valve are fully connected. Turn the coupling nut approximately one-half to three-quarters additional turn until a solid stop. Tighten by hand only. Do not use tools or you could strip the threads.
WHICH BATTERY DO I NEED FOR MY GRILL?
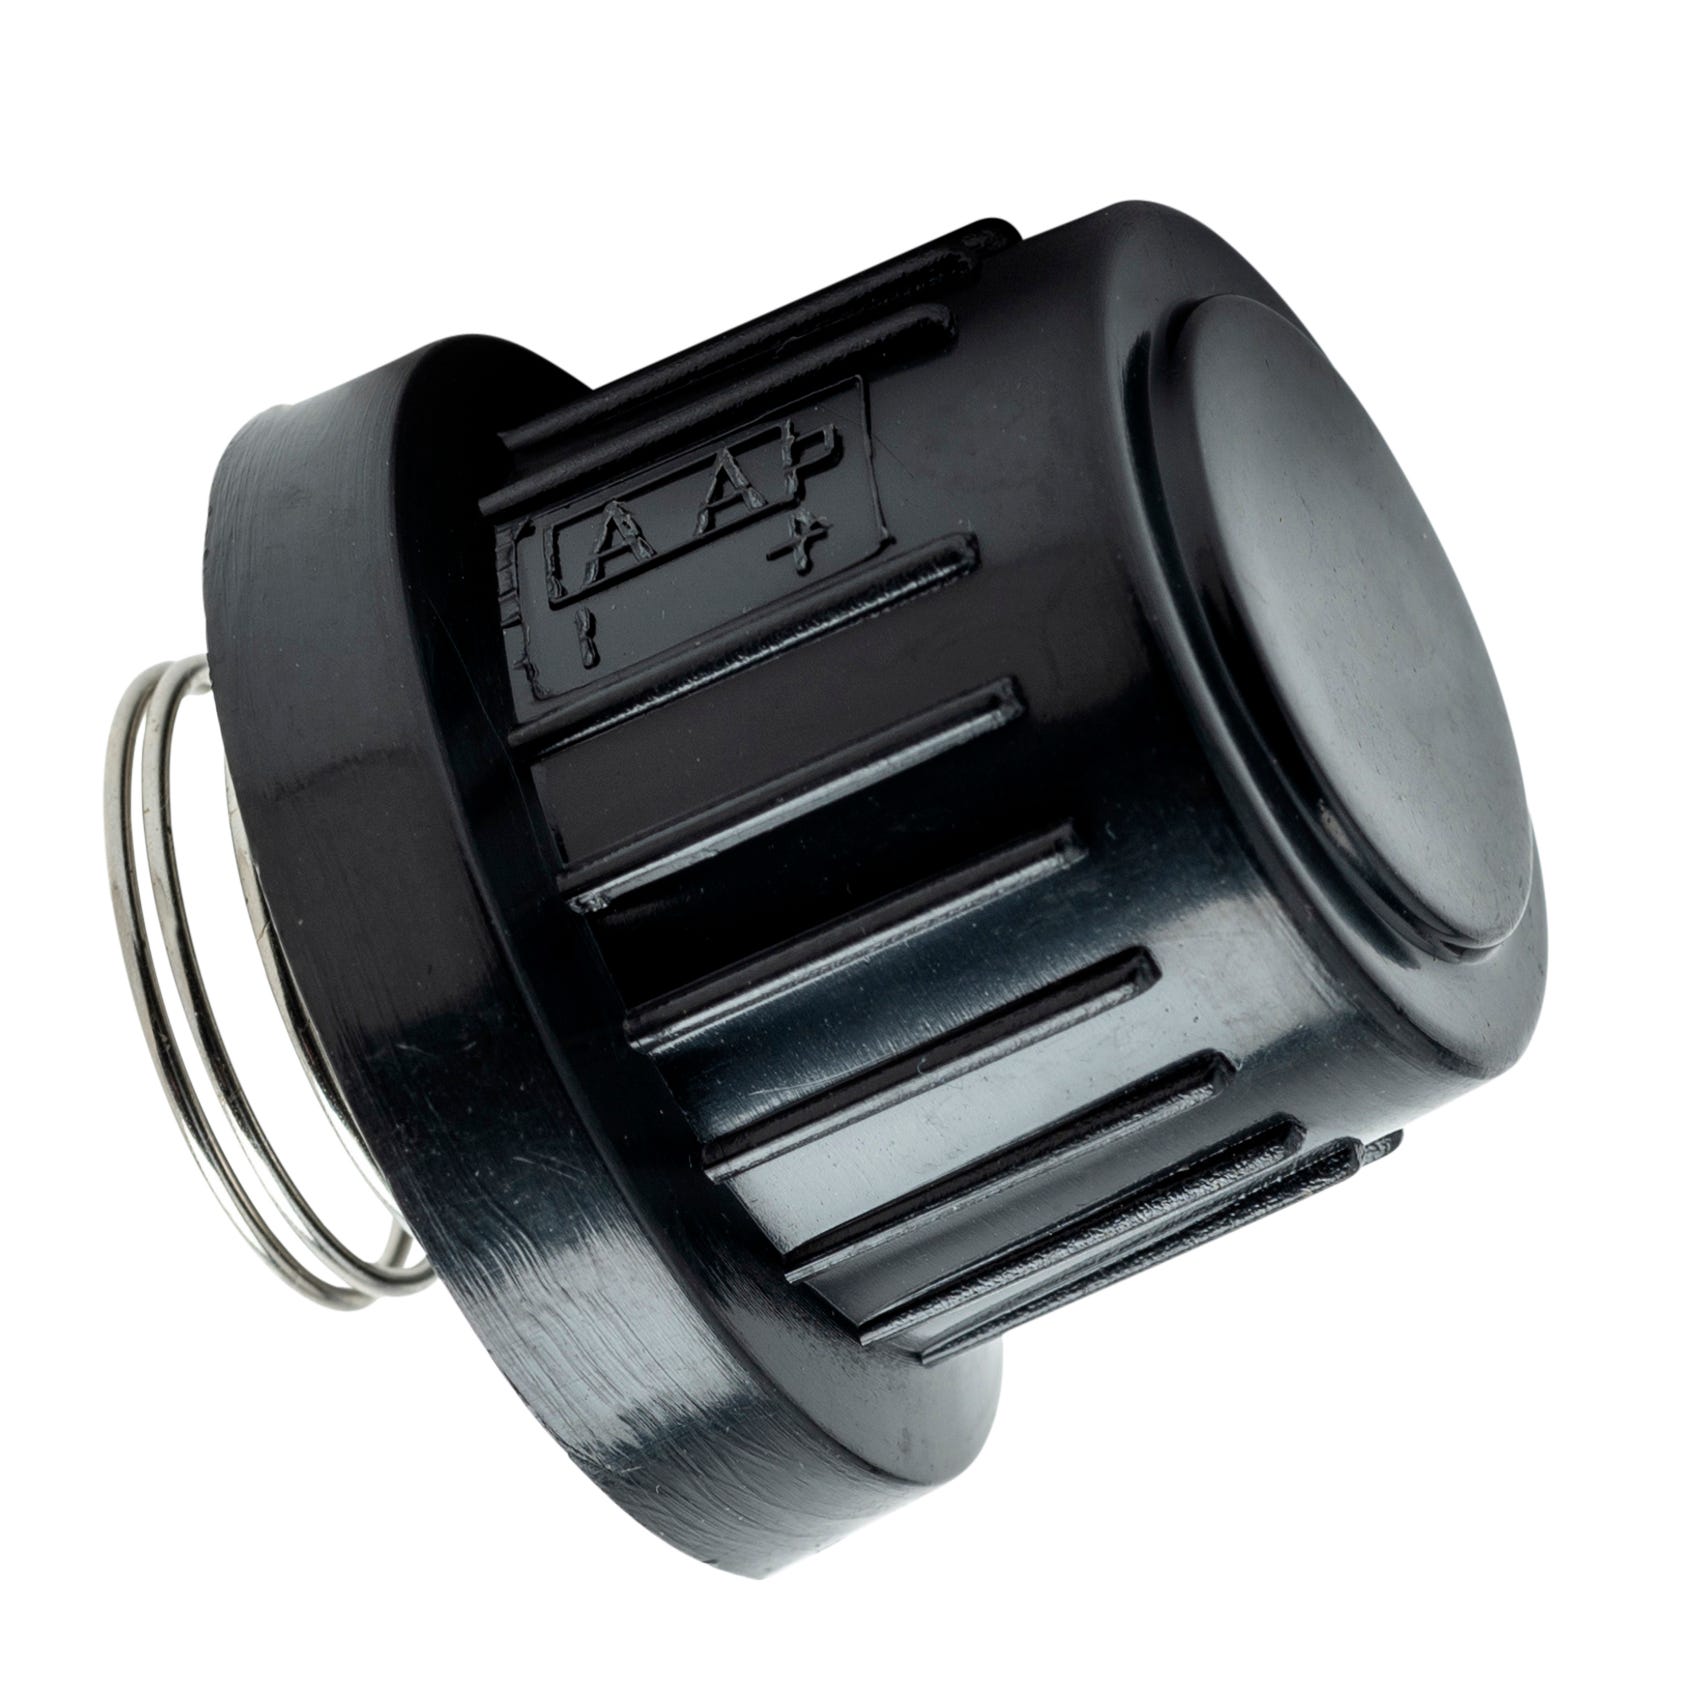
If you have a grill with a SureFire® or electronic ignition and/or LED lighting, you will need batteries here. You can see which battery you need for your ignition on the cover of the battery compartment or on the ignition button. It says in the "fine print" whether you need an AA or an AAA battery. In general, however, you always need 4 AA batteries for the LED lighting, which must be inserted in the separate compartment. Batteries for the ignition are always inserted with the positive pole pointing towards you.

ASSISTANCE GAS GRILLS
REPLACEMENT PARTS FOR MY CHAR-BROIL GRILL (MODELS FROM THE USA)
Our grills have been specially developed and adapted for the European market and are therefore different to the American Char-Broil models. Unfortunately this means we cannot supply any replacement parts for American grills. However, there are individual retailers in Germany who have specialized in the sale of such replacement parts. If you have any doubts, we recommend you contact your local dealer where you purchased your product.
SMOKE FROM THE TRU-INFRARED™ GRILL
TRU-Infrared™ cooking grates and emitter plates are designed to evenly distribute heat and prevent flare-ups. The food is heated directly above the grill surface, which preserves the flavor that escapes with other grills and also has the advantage that the food does not burn, remains juicy and uses less gas during the cooking process. At the same time, especially with heavily marinated grilled food, more smoke can also be produced because the liquid does not run off directly but collects on the emitter plate. We therefore recommend letting marinated grilled food drain properly beforehand. This way you can avoid more smoke and fully enjoy the benefits of the TRU-Infrared™ grill system.
COOKING FATTY FOODS OR POURING MARINADES ON A LIT GRILL CAN LEAD TO A GRILL FIRE
When grilling any type of meat all excess fat should be trimmed off. If the fat is not trimmed it will begin to melt during the grilling process and drip onto the flame tamers and burners. If this grease comes in direct contact with an open flame it will cause a flare up. Continuous grease contact with the flame can cause a grease fire. Grease fires allow your grill to reach temperatures well above the rated level and can cause serious damage to your grill. Foods with high fat content also create a lot of smoke when grilling, especially on infrared grills. Pouring marinades over an open flame can also cause flare ups and grease fires. It is best to marinade your food prior to grilling. If you plan on reapplying while grilling use a basting brush. Never pour marinade on the food while it is on the grill.
ENAMEL/VARNISH IS PEELING OFF
After some barbecue evenings, it sometimes looks to you as if the enamel / paint in the fire box or in the lid is loosening or peeling off.
Don't worry: the lid and the firebox of the grill are enamelled. No paint or other coating is applied. However, what flakes off is clinging grease residue/marinade that burns with the grilling (fat carbonized from the heat). So it looks like the paint / enamel is peeling off here. However, these residues can be removed again by soaking and cleaning with fat-dissolving agents and hot water.
If you own the Performance Line with the porcelain-enamelled steel grates, then this also applies to the grates.


Don't worry: the lid and the firebox of the grill are enamelled. No paint or other coating is applied. However, what flakes off is clinging grease residue/marinade that burns with the grilling (fat carbonized from the heat). So it looks like the paint / enamel is peeling off here. However, these residues can be removed again by soaking and cleaning with fat-dissolving agents and hot water.
If you own the Performance Line with the porcelain-enamelled steel grates, then this also applies to the grates.


STAINLESS STEEL GRATES WILL NOT REMAIN SHINY ONCE THEY ARE HEATED
Once stainless steel cooking grates are heated they will turn a light brown or gold color. This is a reaction to the heat. Stainless steel cooking grates need to be seasoned to perform properly, therefore the dark and more seasoned they are the better your cooking experience will be.
FUEL LEVELS CAN CAUSE YOUR GRILL TO PERFORM IRREGULARLY
If your tank is overfilled or almost empty it can cause your grill to perform at lower temperatures. If your grills performance has changed drastically from the one cooking experience to the next it is recommended that you troubleshoot your tank and leak test your grill.
YELLOW FLAMES INSTEAD OF BLUE
When grilling with a gas grill, the flame should be blue. A healthy grill flame may have a little yellow on the tips of the blue flame, but if you’re seeing a solid yellow flame, something isn't quite right. Check a few things:
Regulator Pressure
The most common cause of yellow flames is low gas pressure from the regulator, which is an easy fix that you can do at home.
- Open the grill lid.
- Turn off all knobs on the control panel in front.
- Turn off the tank knob. * Disconnect the regulator from the propane tank.
- Wait 30 seconds. * Reconnect the regulator to the propane tank.
- Slowly open the propane tank knob all the way open.
- Turn on the appropriate control knob and light the grill per the instructions on the control panel.
THE BURN OFF METHOD IS THE BEST WAY TO CLEAN YOUR TRU-INFRARED GRILL
After each use it is advised that you burn off any excess grease and food debris that has accumulated on your grates. Turn the grill to HIGH and close the lid. Leave it on for around 15 minutes and this should turn any remaining food debris to ash. Turn your grill off and allow it to cool a bit. Once the grill has cooled, remove any remaining food particles from the cooking grate using a nylon brush. Baked-on food particles can be removed with the metal scraper on the back side of the grill brush. The stainless steel grilling grates and infrared emitters can also be tapped lightly together to remove baked-on debris and ash. Always coat the grates and infrared emitter plates with a light coat of high-heat cooking oil after cleaning. This added layer of protection will help ensure that food does not stick to your grates.
LIGHT GAS GRILL WITH A MATCH
Make sure you are following this method: Do not lean over grill while lighting.
- Turn gas burner control valves to Off.
- Open lid during lighting or re-lighting.
- Open the valve on your propane tank.
- Place match into match holder (hanging from side panel of grill). Light match; then light burner by placing match through the match light hole on side of grill. Immediately push in and turn burner knob to the HIGH position. Be sure burner lights and stays lit.
- Light adjacent burners in sequence by pushing knobs in and turning to the HIGH position.
WHERE TO FIND THE MODEL NUMBER
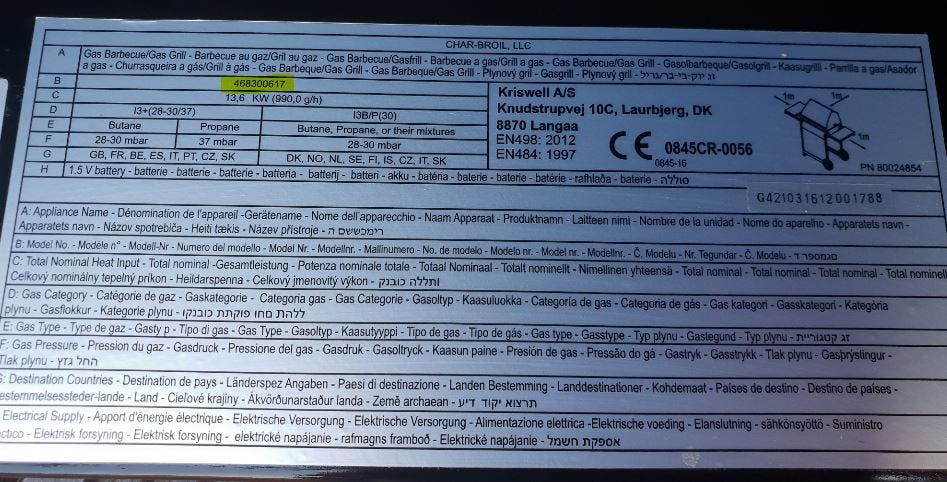
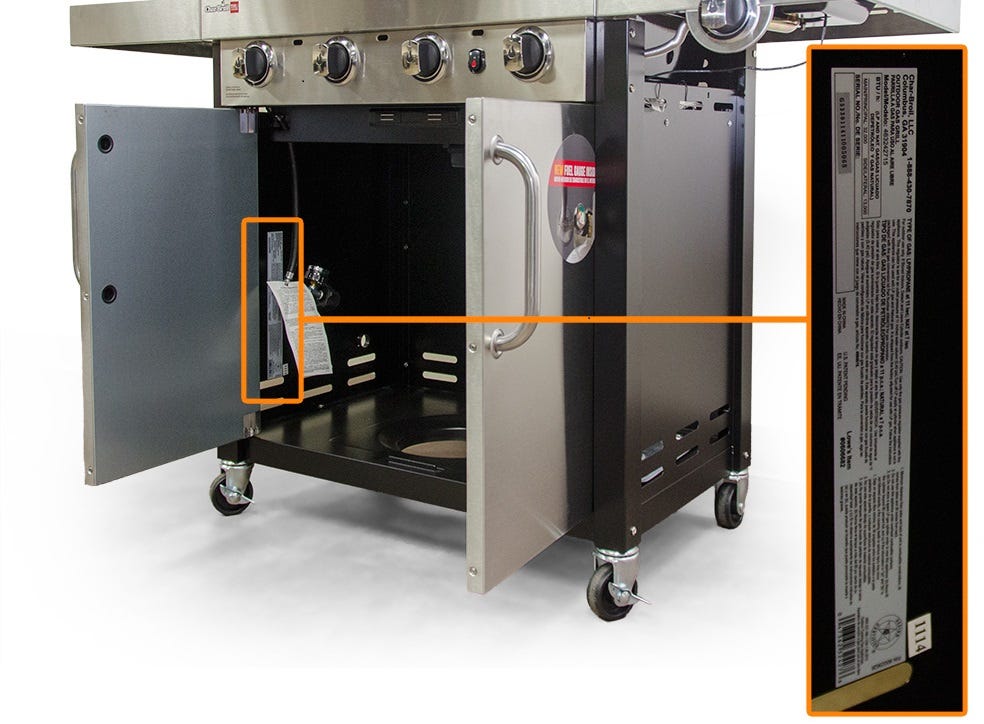
The model number can be located in different places on your grill, depending on the model. It is often located inside the grill, on the base plate, behind the doors or on the back of the grill. In any case, the model number is written in field B on the large silver-grey label and usually starts with 468. You will also find the model number on the packaging of the grill.


MY LID DOES NOT CLOSE PROPERLY ON ONE SIDE
UNEVEN HEAT DISTRIBUTION
Gas burners are tubes through which the gas is "shot" backwards due to the pressure. Therefore, there is always a bit more gas in the rear of the burners than in the front. This is the reason why the front area is always slightly cooler than the rear. This effect is used, for example, when grilling. The food to be grilled is grilled sharply on the grill grates in the rear area of the grill and placed in the front area of the grill for subsequent cooking and simmering.
OPERATING INSTRUCTIONS FOR MY GRILL
Your new Char-Broil grill is supplied together with operating instructions. If your operating instructions should happen not to be included with your delivery, you can download it from our website. Simply enter the name of your product in the search field or select the corresponding product through the navigation menu. You can now find further information such as the assembly and operating instructions and also other manuals as PDF files. Are you looking for recipes for your Char-Broil grill? Have a look through our recipe collection and get inspiration https://www.charbroil.co.uk/recipes
BURNER BLOCKAGES CAN CAUSE VENTURI FIRES
Food Debris and nesting spiders can clog your burners and cause a venturi fire. Venturi fires occur when something is blocking the gas flow from your valves to your burner ports. If the gas flow is obstructed, back pressure ignition can occur, causing fire at the valve/venturi. You should regularly remove and clean your burners to prevent this from happening.
FURTHER QUESTIONS - GAS GRILLS
OPERATING INSTRUCTIONS FOR MY GRILL
Your new Char-Broil grill is supplied together with operating instructions. If your operating instructions should happen not to be included with your delivery, you can download it from our website. Simply enter the name of your product in the search field or select the corresponding product through the navigation menu. You can now find further information such as the assembly and operating instructions and also other manuals as PDF files. Are you looking for recipes for your Char-Broil grill? Have a look through our recipe collection and get inspiration https://www.charbroil.co.uk/recipes
REPLACEMENT PARTS FOR MY CHAR-BROIL GRILL (MODELS FROM THE USA)
Our grills have been specially developed and adapted for the European market and are therefore different to the American Char-Broil models. Unfortunately this means we cannot supply any replacement parts for American grills. However, there are individual retailers in Germany who have specialized in the sale of such replacement parts. If you have any doubts, we recommend you contact your local dealer where you purchased your product.
WHERE TO FIND THE SERIAL NUMBER
The serial number may be located in different places on the grill, depending on the model (images 1 and 2). Often, it is inside the grill, on the lid, over the doors or on the back of the grill.
In any case, the serial number (often a letter followed by 15 numbers) appears on the large grey label within a smaller silver label (Image 3). The serial number is not on the box in which the grill is delivered.
The serial number is not on the box in which the grill is delivered.
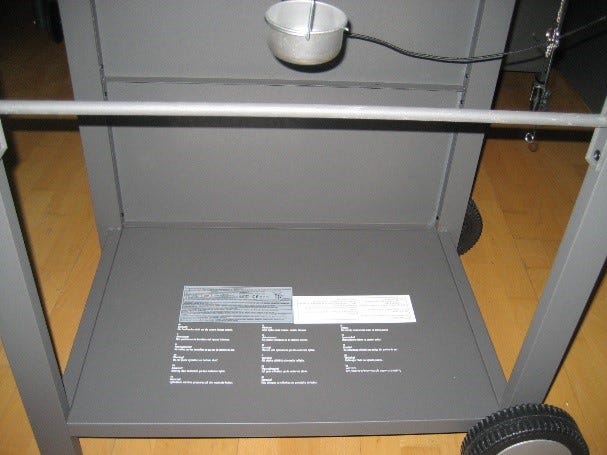
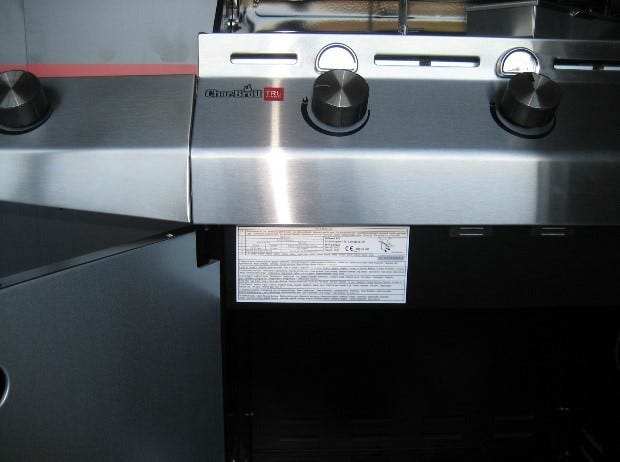
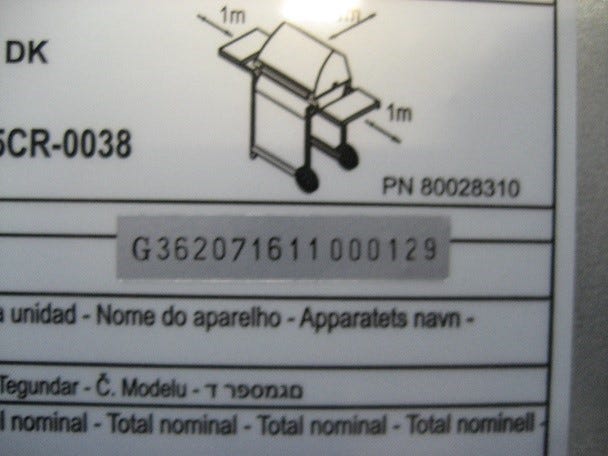
In any case, the serial number (often a letter followed by 15 numbers) appears on the large grey label within a smaller silver label (Image 3). The serial number is not on the box in which the grill is delivered.
The serial number is not on the box in which the grill is delivered.


